JfsCounter
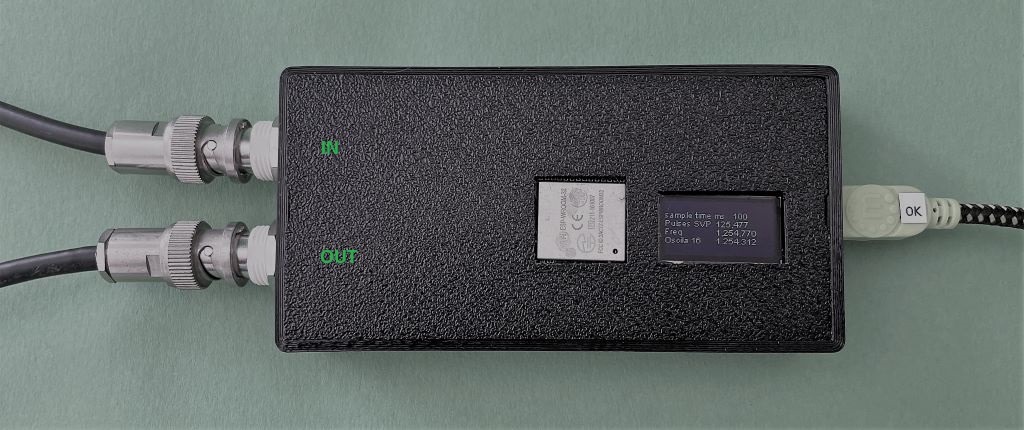
ESP32 Pulse Counter with Python GUI
A High-Accuracy Pulse Monitoring System with PC Interface
This project builds upon the ESP Frequency Meter by Rui Viana and Gustavo Murta, which offers exceptional accuracy (1 Hz to 40 MHz) and includes a built-in oscillator for self-testing. My enhancements focus on 5V TTL compatibility and a custom Python GUI for control, visualization, and data storage.
Key Features:
ESP32 Pulse Counter:
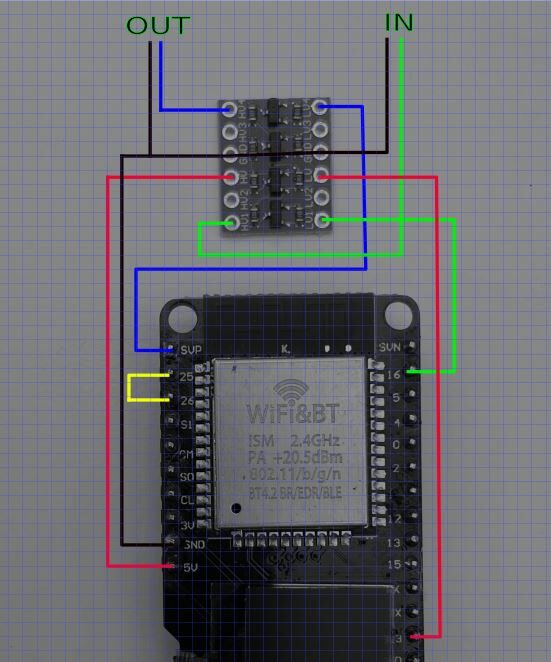
Counts pulses with a 5V level shifter for safe TTL signal input.
Communicates via USB serial (115,200 baud) for real-time data transfer.
Programmed in Arduino IDE, derived from the open-source ESP Frequency Meter.
Python GUI (PyQt6 & PyQtGraph):
Port Control: Open/close serial connection.
Measurement Control: Start/stop counting, clear display.
Oscillator Management: Adjust test frequency.
Timebase Configuration: Set counting intervals.
Self-Check Mode: Validate hardware functionality.
Data Visualization: Leverages PyQtGraph for dynamic plotting and analysis.
Credits & Acknowledgments:
Core frequency-measurement logic from the ESP Frequency Meter (Rui Viana, Gustavo Murta).
First-Time Setup & Quick Test
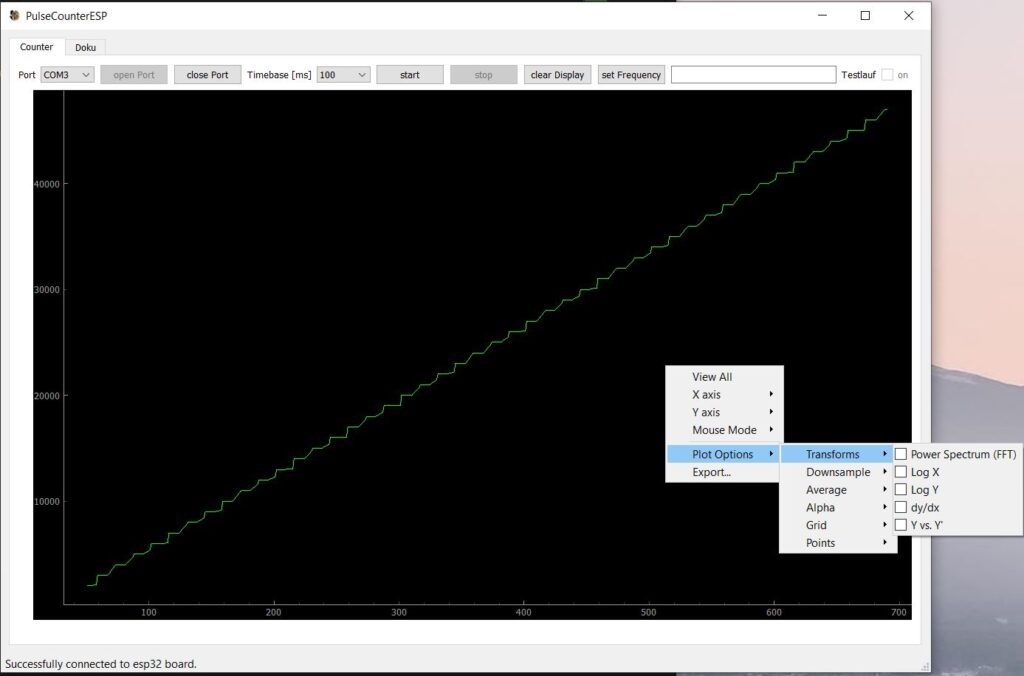
After installing the PC software and connecting the ESP32 via USB, follow these steps to verify functionality:
Hardware Setup
Connect the device’s input and output with a BNC cable (self-test loopback).
GUI Configuration
Select the correct COM port and click Open Port.
Set the timebase (default: 100 ms).
Run the Test
Click Start to begin counting.
Enable Test Mode [ON] to activate the internal oscillator—the pulse frequency will increment automatically.
Use Clear Display to reset the visualization.
Stop & Analyze
Click Stop to end the measurement.
Right-click the display to access advanced PyQtGraph options (e.g., zoom, export, or plot customization).
Parts
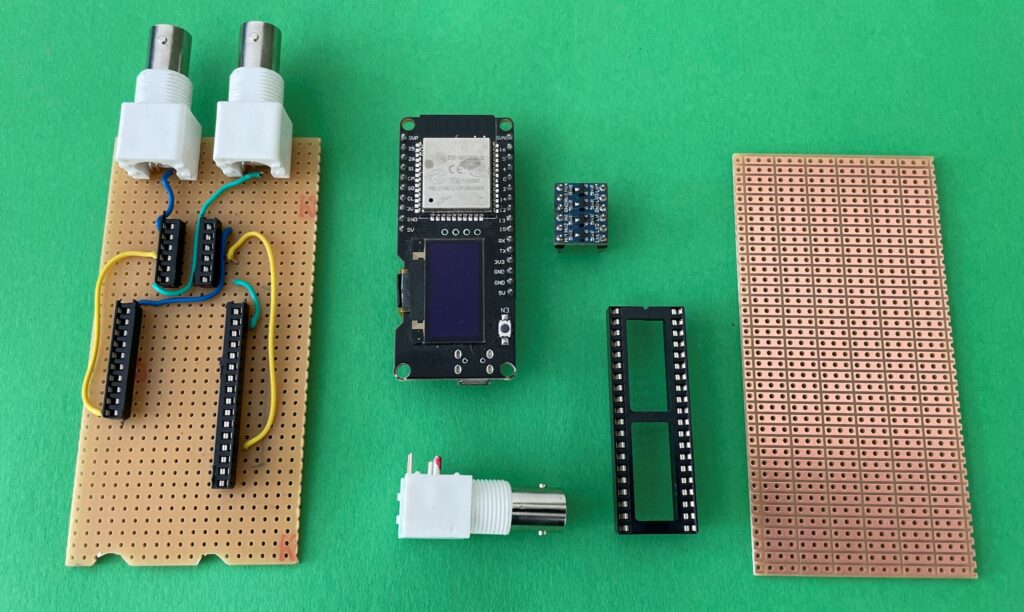
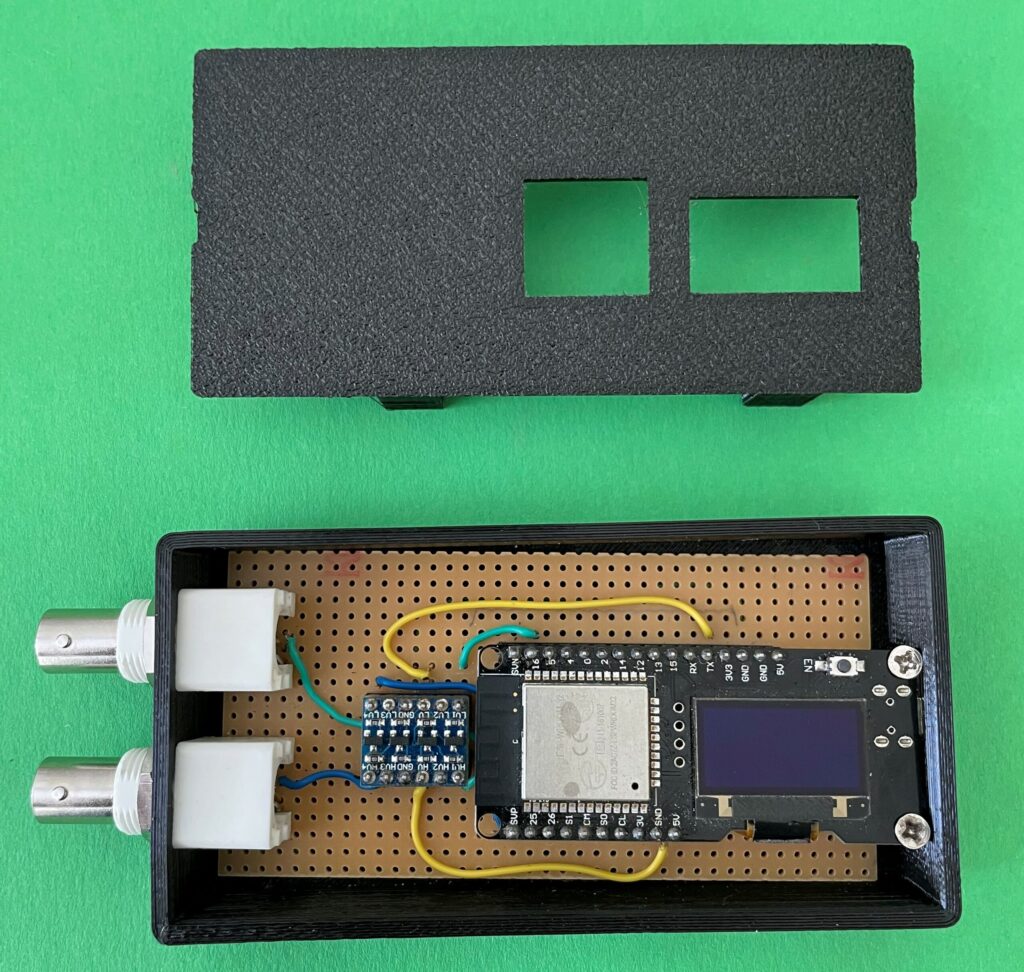
- ESP32-S WiFi Bluetooth Development Board 0,96 OLED Display WROOM 32 NodeMCU
- Pegelwandler 4 Kanal I2C Level Converter 5V-3.3V
- BNC Connector | Board | IC socket
- STL – Files are available from github
Schema
Case

ESP32 Firmware Installation with PlatformIO
📋 Requirements
- Visual Studio Code installed
- PlatformIO IDE extension installed
- ESP32 development board (e.g., ESP32-DevKitC)
- USB cable (data-capable)
🚀 Quick Start Guide
1. Clone the repository:
cd JfsCounter
2. Open the project in VS Code
Open the esp32_firmware folder in VS Code with PlatformIO
3. Connect your ESP32 board
Connect the ESP32 board to your computer via USB
4. Flash the firmware
Click "Upload" in the PlatformIO taskbar (right arrow icon)
Alternatively in terminal: pio run --target upload
ℹ️ Additional Notes
- The first time setup may take several minutes as PlatformIO installs required components
- Ensure you have proper USB drivers installed for your ESP32 board
- If upload fails, hold the BOOT button during the upload process
- For serial monitoring:
pio device monitor(baud rate: 115200)
PC Software Installation Guide using Virtual Environment
This guide explains how to install the JfsCounter PC software using Python Virtual Environment and requirements.txt.
Prerequisites
- Python 3.7 or higher installed
- pip (usually installed with Python)
- Git (optional, if cloning the repository)
Installation Steps
1. Download the project
Either clone the repository:
cd JfsCounter
Or download and extract the ZIP file
2. Create a virtual environment
3. Activate the virtual environment
Windows:
Linux/MacOS:
4. Install dependencies
5. Run the program
Note
Make sure your ESP32 counter is properly connected to your PC before running the program.
